Showing posts with label rigging. Show all posts

7/11/12

Types of Hand Rigs

So, it seems that I am destined to be rigging hands for years to come.  It's been quite a while since first rigged my hand for the spider crawl, which actually turned out pretty fun.

That was one of the first tests I did using that IK/FK rig for the hand.  A simple walk cycle - I can see now how certain fingers slide inappropriately and there could be a lot of refinement.  And I beg your indulgence in this video - a short clip of the hand from the animatic I made for a school project, back in the day.  But a good example of the animation I was doing then.


I'm not even going to go into what I would change - but I would love to revisit this animation.  And I may do so eventually.  It was a fun concept.

However, this is one example of what kind of animations can be produced with a semi-decent IK rig.  A more generalized type of motion, very fluid, not very precise, but more 'movie-like.'

I consider this to be a 4 (on a scale of 1 to 5) for complexity.  I didn't include a way to manipulate individual carpal bones, like you can do with this type of rig.

Hand rig with carpal bone manipulation

Most rigs don't need carpal bone changes, as they actually change very, very little.  I also realized that most rigs aren't using actual bones either, but pretty much all of mine do.  A 'hazard' of being a medical illustrator.

I have done some animations that actually show the changes in carpal bones during tensing and relaxing of specific motions.  However, those were all FK only rigs, as I needed to very specifically place and animate all of the bones (based upon fluoroscopic videos and segmented bones from CT scans from the tensed and relaxed positions).  This was another early rig, and I can think of better ways to do it now, but it served it's purpose at the time.

I just finished another rig, one for an arm, including the hand.  We are testing out a new, innovative type of motion capture (that I can't actually say much about now...) and we needed a basic rig for said testing.


So, I have a FK rig for the shoulder, elbow, wrist, and fingers here.  I used to bind anatomical bones to rigs using the rigid bind method, as they are rigid bodies, but that actually really limits you on later editing.  So, I now bind using the smooth bind, but I limit the influences to 1 and bind to selected joints only.  This helps me during the process of editing the rig as necessary (and makes for very pretty colors).


The hand itself is a fairly simple rig as well.  The thumb has a metacarpal joint, but the fingers do not.  The finger metacarpals are pretty stationary (with some exceptions, but not an appreciable amount for this type of rig).  The fingers and thumb can bend at every joint, and the wrist also has basic movement as well.


I'm not entirely happy with the way the wrist moves, as there is sliding motions involved in true wrist movement, and my rig just has the rotation involved now.  I'm thinking there might be some MEL scripting that I can incorporate to automatically slide the joint as it rotates, but I haven't worked it out yet.  I'm letting it percolate in the back of my head right now.

As you can see here, the joints were improperly rotated at first.  This caused the fingers to deviate improperly when formed into a basic fist (as well as other movements).

I generally use the finger curl/fist movement to initially test a rig as it shows big problems right away without a lot of testing needed.


I popped back into the component editing and straightened out my joints further.


And now you can see that the fist is correct.  This is the extent of this rig, as it is only being used to test another system.


I've certainly learned a great deal since that initial hand animation.  I use hand rigs quite often at Stanford, mostly just to position different types of anatomy, especially the bony structures.  I don't use the IK-FK method often, as I usually need to position bones quick and dirty like.

My next greatest challenge (probably a 12 on the scale) is to make a rig that can handle all of the soft tissue elements (muscles, ligaments, arteries, and nerves) as well as the bones.  That's... going to take some thinking.


7/10/12

Rodin Gallery

So, I think I spent more time trying to figure out an image gallery for this blogger blog than I did at the museum.  Not literally, but it sure feels that way.  And we'll see how this works.  Please, let me know how this style of image gallery works for you, and if you prefer this gallery style. Or if you would rather the larger, expandable version of the images, I would love to know that too.

I had a great time at museum, and these are a few of the follow-up images I tried to take of the Rodin hands.  


And for your viewing pleasure, a few of the other images from the day.

7/6/12

Rodin Hands, part 2

I went down to the Gates of Hell today.  However, the weather was actually fairly pleasant.


I was able to take some helpful photos of the hands in their natural museum environment.  I also learned a valuable lesson - always check your equipment before shooting.  I was shooting in JPG mode, not Camera Raw, unfortunately.  It actually is not a huge deal, as these are just reference images.... but it still bothers me.  Live and learn, I suppose.

So, these are the best quality, but I sure had fun taking them.  I will probably wander back through the Cantor Arts Museum- it's both free and awesome.  Not a combo you see very often!

In the mean time, a smattering of some of the many, many images I took today.

Rodin, 1885-1886: Left Hand of Pierre and Jacques de Wiessant


Rodin, 1888: Large Clenched Left Hand

Rodin, 1903: Large Left Hand - detail

Rodin: Small Clenched Right Hand - detail

Rodin: (behind) 
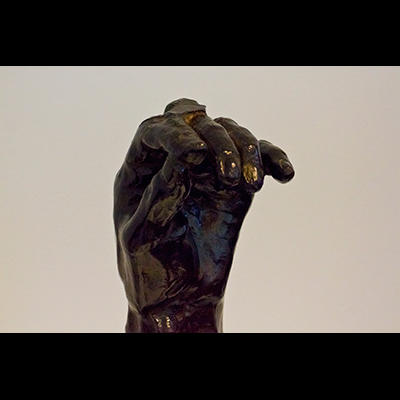
Small Clenched Right Hand, (foreground) Clenched Left Hand, 1900

Rodin, 1880-1884: Blessing Left Hand

Rodin, 1886: Left Hand of Eustache de St. Pierre - detail


Rodin: (foreground) Blessing Left Hand, 1880-1884, (behind) Large Left Hand, 1903

7/5/12

Rodin Hands

So, The Cantor Arts Center, one of the museums at Stanford, has a wonderfully fantastic collection of Rodin sculptures, including:


 Admission into the museum is free, happily enough.


We, however, are going to be working with the Rodin Hands.


Not as well known, but supremely interesting.  One of the professors here at Stanford even uses the hands as a way of teaching, as 5 out of the 8 hands display a pathological condition.

A sneak peak into (one of the things) we are doing here at Stanford- Rodin in 3D. I have been working on fitting a model from a segmented data set containing broken metacarpals.  Fairly severely broken metacarpals, even.  However, I am jumping ahead of myself.

The Stanford Clinical Anatomy department has been working on getting the hands laser scanned and converted into 3D models.  This is where I come in.


While I can't really show images of the project in progress, rest assured that it's a lot a fun.  Leslie White and I are working on the hands together.  We're having to fill in the 3D models where the laser scanning technology didn't pick up the surface.  Holes, sometimes giant holes, were left in the models.  These need to be filled in carefully, keeping as true to the original surface as possible.  I will be heading over to the Cantor Arts Center tomorrow to take more reference photos for this process.

Afterwards, we will be superimposing pathological anatomy, the same types of conditions the hands express, into the scans.  I just finished putting the shattered metacarpal scan into one of the hands this afternoon.

We have a crack team of interns that have been working on segmenting out the metacarpal data from a CT scan.  With a little bit of clean up in Amira from yours truly, it was ready to be exported as individual bones, rigged in Maya,


and repositioned into the Rodin hand scan.  An interesting process, to be sure.  Next, our crack team will be working on retopo'ing the hands themselves so they can be used in a real-time environment.  It's going to be awesome.  They are going to be learning 3D Coat to do the retopo'ing process.

In any case, I can't wait to see where this project is headed.  It looks to be a great start, and I can't say how excited I have been to be involved!


3/4/09

Hand Rig


Well, this is my detailed hand rig v 1.5 (I felt it deserved a higher than just 1 seeing as I've reworked it about seven times just this night). Eventually the bones will have a spider-like motion. The geometry is bound with a rigid system, as they are bones and need to move independent of one another. I have not yet gotten a chance to retopologize these bones yet, so they are a tad heavy on the polygon count considering their size.


The smallest bone (the distal phalange of the 5th digit) has 340 faces. The densest bone (the metacarpal of the 2nd digit) has 2,636 faces. There are a total of about 30,000 polygons in this model. Needless to say... this is a tad extreme for this model and this could easily be cut in half if not much more than that. I will be considering this as I refine the model.


The reason that they are so polygon heavy is due to the face they are actually exported from a DICOM imaging program. I will be touching on the process I use to go from DICOM data to model at a later date. At this point all that needs to be known is that it gives highly accurate, overly dense model exports. I mentioned the Zbrush retopology feature in an earlier post.


So, as can be seen, the rig itself doesn't have that many bones or IK chains. However, as I was posing it for this post, I noticed some areas (namely the metacarpal joints) that need greater control during IK posing. So, I'll be adding a few more IK solvers soon. The bones just aren't bending quite right with the current set up. It's possible to edit them as I animate, but another set of IK chains will just speed the process up.


In any case, the actual boning is fairly standard, with a joint at each... well... joint. I did not include the midcarpal joint though, seeing as the wrist ends at the carpal bones and no bending is occuring there. But that would have been a non-standard joint in any case. So, there is a root, a wrist joint, and then joints at the carpometacarpal joint, metacarpophalangeal joint, and interphalangeal joints. While the joint between the carpal bones and metacarpal bones doesn't actually experience a great deal of movement, some artificial movement may need to be built in for a more natural walk cycle.


The real complexity begins in the control curves. I of course have the basic control at the end of each digit that constrains the IK handle for that finger. There is also a pole vector on each finger as well, as seen by the number 1-5 (referring to the digit number). There is the body control curve (the B) and an overall wrist control box.


I thought about having curves at each joint to control the orient during FK mode. However, I decided upon set driven keys instead, controlled at the wrist control box. Each joint that would bend during making a fist has its own individual attribute in that curve. In addition, a master IK-FK Blend switch is also there. I tried to make a fist control that I could turn on and off, but I have yet to accomplish that... I think there is a way, but it will involve more linking that I had done so far. I had hoped there was a simpler method.

In any case, the constraints within the curve system were interesting to set up. I wanted the Bend curves (the pole vector controls) to move with the IK handles most of the time, be able to move independently if I needed them to while still staying linked to the IK controls. Also, I needed them to be able to switch to following the Body control curve. So I made an attribute that controled the weight of the constraint as needed.

The body curve moves the wrist joint, not the root. The wrist control box both moves and rotates the entire hand. And of course, it controls the IK-FK blend mode for all five fingers. There is a set driven key on each IK control curve, and then the master set driven key is on the wrist control box.

Now, as I begin to see how this rig animates, I will start planning the walk cycle and other character movements. The hand is going to move across the room and crawl up a table leg, so I will need some pretty fine control over every joint. Hopefully I can add in some standard movements that can be easily triggered. Wish me luck. And if anyone has any hints as how to make this rigging better, I would love to hear them.